Painting the Playmobil Arena November 19, 2018 09:31
Now that Playmobil's excellent arena set is back in production we wanted to share our process for turning it into an appropriate backdrop for games of Arena Rex. Follow along, it's quite easy and I expect experienced modelers will have a few more ideas how to enhance the kit beyond this basic but effective approach.
You can find the set here.

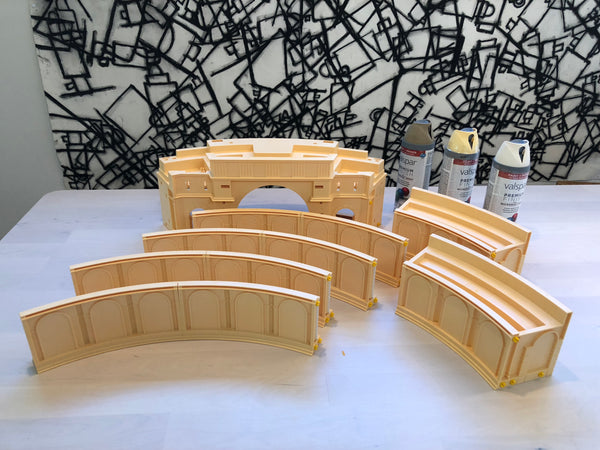
We won't use many of the bits included. You'll also need to get a couple cans of spray paint suitable for plastic surfaces. One will be a base coat and one or two more will be highlights. It takes about one full rattle can to base coat the bits.
Go ahead and assemble the editors box (leave the iron bars and walls off for now) and glue yellow connectors into one side of each section. There are 8 small wall sections, we glue them into 4 pairs permanently, it makes transport and assembly a little simpler.
(note yellow connector bits only on the right side, these are glued into place so they won't be lost during dis-assembly.)
Now it's time to base coat the walls. Try to get an even coat and make sure to coat the details' underside, as this is the shadow layer. This step is best completed unassembled.

Be sure to do this in a well ventilated area, I wear a mask because spray is nasty.

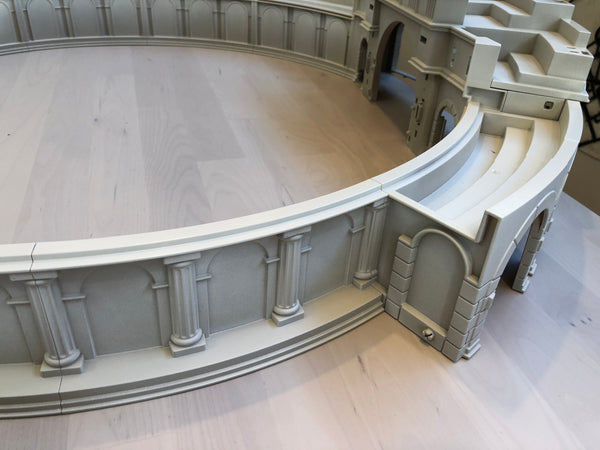
Now we'll move onto the highlight. Assemble the arena and grab a lighter color of paint. Only spray this layer from above at a slight angle. Thats the secret; it creates a really nice lighting effect without much effort. Be sure to give attention to the interior and exterior walls. Go slow, there is no undo :)


This is the effect we are going for.

Don't glue this yellow connector in, it will be exposed when the arena is assembled.
The arena now has that dusty stone look I was going for. Now it's time to move onto the gates. These are molded in a metallic bronze plastic that really needs a little more depth. The easy way to add this is to dry brush some brighter gold or silver onto these parts. Drybrushing, if you weren't aware, is the technique of dipping a brush in paint, wiping most of the paint off the brush until there is almost none left and vigorously brushing the subject. Games Workshop makes some paint just for dry work, I'm trying it for the first time here. It worked well in this case, thumbs up for terrain use :)
The gate on the right has been dry brushed, details are picked out and the toy looks like less of a toy.

I dry brushed the little black gate connectors too, you may want to assemble them before spraying the arena for a different look. You can use the doors to push them into place to avoid some finger pain.

Assemble the gates and you are ready to go.


It only takes about an hour to complete this project, especially if you do your dry brushing while the spray paint dries. Now your arena is ready for play or extra embellishment, go to town adding graffiti to the outer walls, using washes in crevices for extra depth and so on. Above all, enjoy yourself!
In future we may do a part II focusing on the base and pits we created for our showcase arena.
Until then...